Keeping our mission to shine a light on healthcare cost and quality, we’re excited to announce the launch of the Direct Listing application—a tool designed to bridge the gap between transparent providers and informed patients. Built with organizations in mind, the Direct Listing application offers a powerful, Excel-like, user-friendly platform for healthcare providers to post their medical services and prices—making healthcare more accessible and predictable for everyone.
Why Do We Need ?
In today’s healthcare landscape, the United States spends approximately $4.8 trillion annually on healthcare, representing nearly 19% of the nation’s GDP [1]. Yet, studies often find either no meaningful link or even a negative correlation between cost and quality in healthcare [2]. This gap highlights an urgent need for greater transparency in both medical pricing and quality metrics. Patients deserve upfront clarity on the costs of services—especially as out-of-pocket expenses continue to climb, with medical debt persisting as the leading cause of bankruptcy in the country. We personally know people who postponed or skipped getting needed health care because of the cost. Sad but real. Hence we want to tackle this issue by harnessing the collective strength of transparent providers.
How Direct Listing Portal Is Different ?
Direct Listing is designed to meet the needs of healthcare organizations of all sizes. Whether you’re managing a single facility or overseeing a network of locations, our application provides the flexibility and control you need to showcase your services effectively. At its core, the platform operates on an organization-level structure, allowing each organization to manage multiple facilities under one umbrella.
Here’s how it works: An authorized person, known as the Super Admin, registers the organization within the application. Once registered, the Super Admin can add as many facilities as needed—each with its own set of services and pricing. The Super Admin has the authority to add users at both the organization and facility levels, assigning roles based on each individual’s responsibilities. These roles include:
- Editor: Authorized to update and manage service listings and pricing details.
- Viewer: Granted read-only access to review prices without making changes.
- Facility Only: Limited to managing or viewing a specific facility’s data.
This role-based structure ensures that the right people have the right access—whether it’s a facility manager updating prices or an executive/owner reviewing organization-wide data.
Step-by-step Procedure to Publish Your Price
Let’s begin with an example of a medical imaging provider named Transparent Imaging Center. Transparent Imaging Center has multiple facilities located across the United States: Transparent Imaging Center – Los Angeles, Transparent Imaging Center – Salt Lake City, and Transparent Imaging Center – New Jersey. Each facility offers different pricing. Here is a list of two services (X-ray of chest, 2 views and MRI scan of blood vessels of neck with contrast) provided at these facilities:
| Location | Service Name | Price | What is included |
|---|---|---|---|
| Los Angeles | X-ray of chest, 2 views | $95 | Radiologist fee, Facility fee, Imaging, Equipment & supplies |
| Los Angeles | MRI scan of blood vessels of neck with contrast | $590 | Radiologist fee, Facility fee, Imaging, Equipment & supplies |
| Salt Lake City | X-ray of chest, 2 views | $75 | Radiologist fee, Facility fee, Imaging, Equipment & supplies |
| Salt Lake City | MRI scan of blood vessels of neck with contrast | $805 | |
| New Jersey | X-ray of chest, 2 views | $95 | |
| New Jersey | MRI scan of blood vessels of neck with contrast | $805 |
Create and Verify Your Account
You can register your facility here in one of two ways:
- Using your business/personal email address
- Single Sign-On (currently supporting Gmail)
We recommend using your business email. While we require providers to submit documents to verify their legitimacy, a business email provides credible evidence of your affiliation to provider. If you don’t have a business email, you can still register using a personal email address.
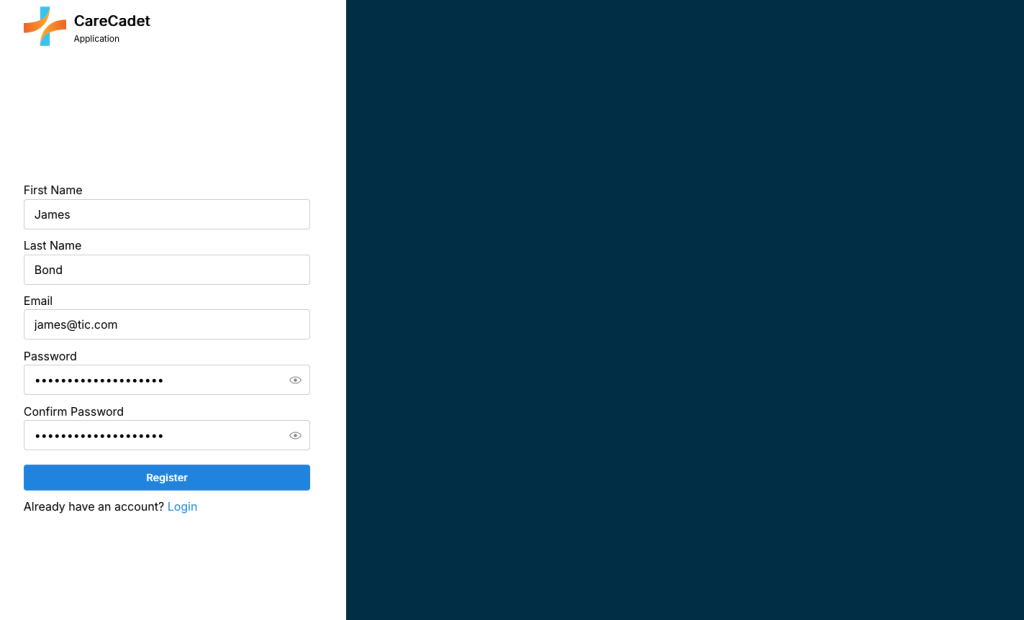
After registering, you’ll receive an email to verify your email address. Once verified, you’ll be directed to the organization registration page.
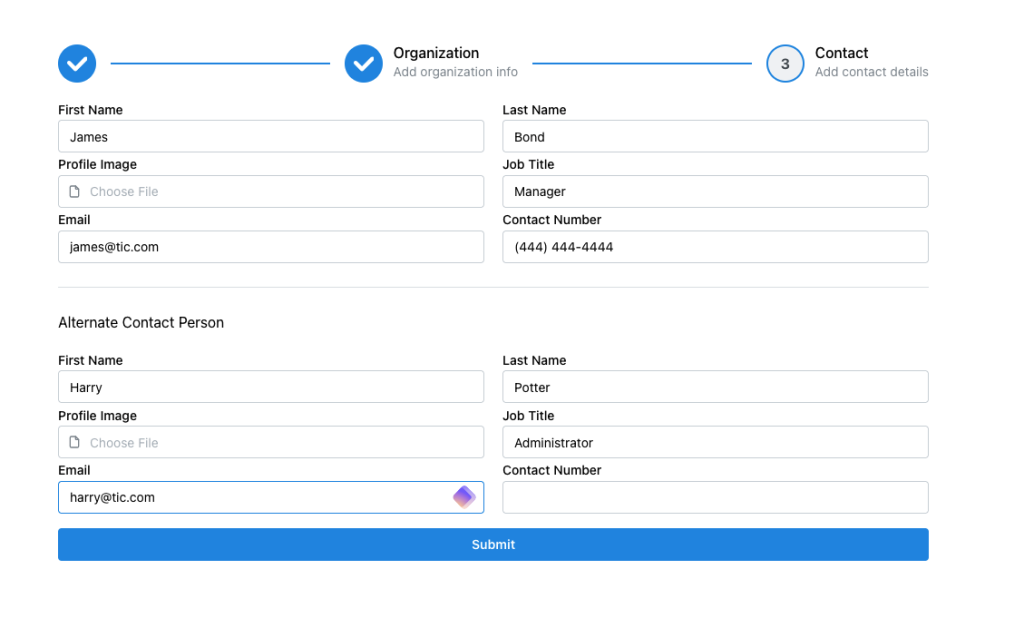
Enter Organization and Contact Person Information
You will need to enter your organization’s details, including name, address, and contact information. Note that this may differ from the actual practicing location. Later, you’ll be able to add facility details—these are the addresses that will be visible to patients browsing for medical services.
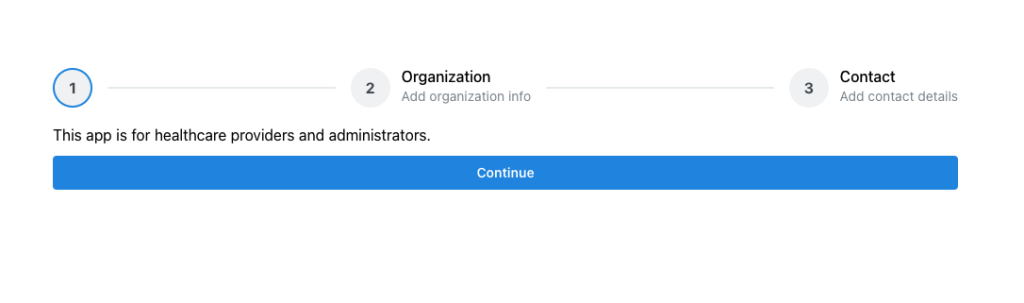
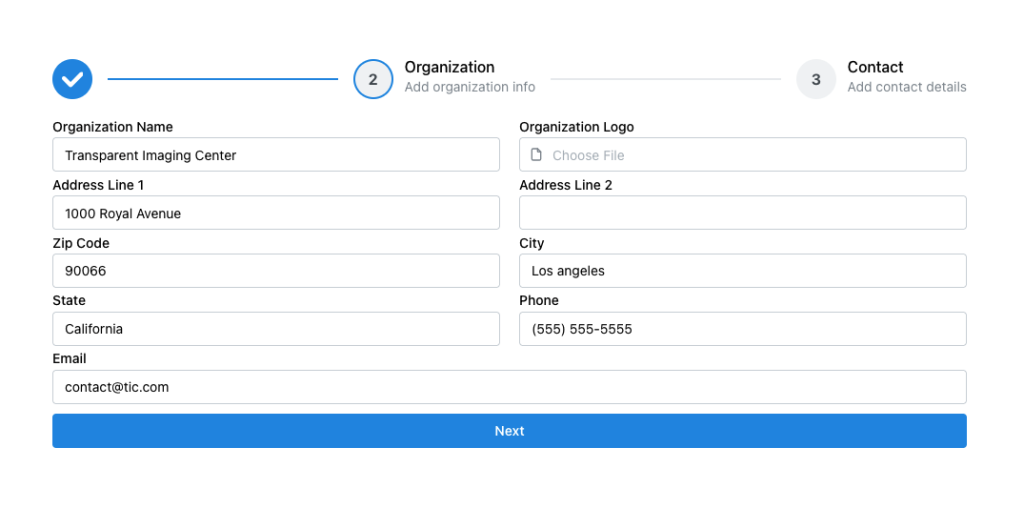
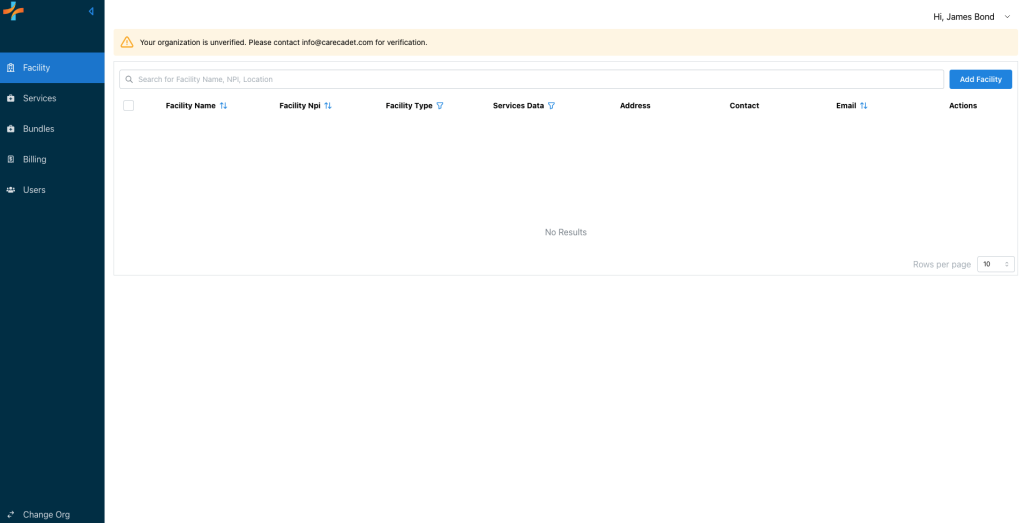
Once you complete the organization registration with your contact information, you’ll be directed to the main application, where you can add facilities and services.
Adding Facilities
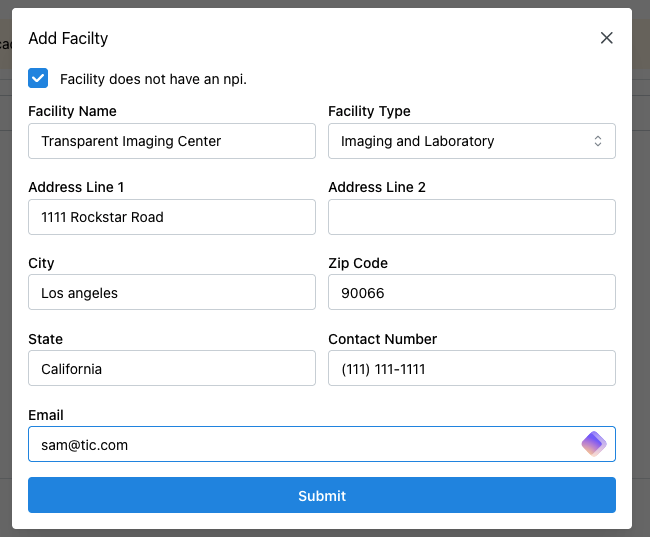
Once you click on “Add Facility”, you will be prompted to enter information related to your healthcare facility. If your facility has a registered NPI (National Provider Identifier), you can start typing the official business name, and a drop-down menu will suggest matching options. If you could not find your NPI or your NPI is not listed, please select “Facility does not have an NPI“.
For this example, we’re using a hypothetical facility—Transparent Imaging Center—which does not have an NPI. In this case, simply select the option “Facility does not have an NPI“ to proceed. Next, enter the facility type and the address of your facility. Once everything looks good, click Submit—and voilà! You’ve successfully added your first facility to your organization.
If your organization operates multiple facilities, no problem—you can continue adding each one by repeating this process. It’s quick, easy, and helps keep your facility data organized in one place.
If your organization has multiple facility locations with the same name, our application will automatically detect this and append the location to distinguish each one.
For example, in our scenario, we have three branches of Transparent Imaging Center in three different cities (Los Angeles, Salt Lake City and New Jersey). When you add a facility and enter just the name—“Transparent Imaging Center“—our system will automatically recognize the duplicate name across locations and append the location (street and city name) to each for clarity (see figure below). This ensures every facility is clearly identified, without requiring you to manually adjust the name.
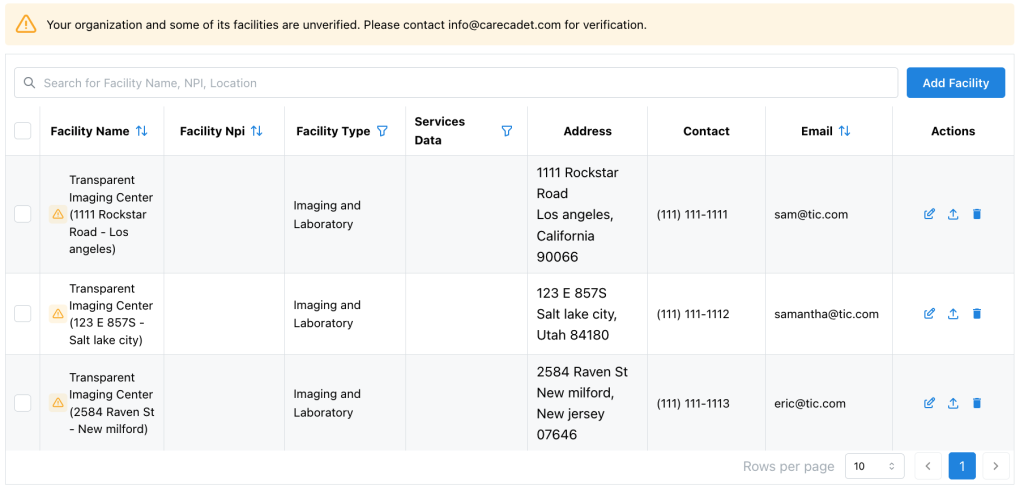
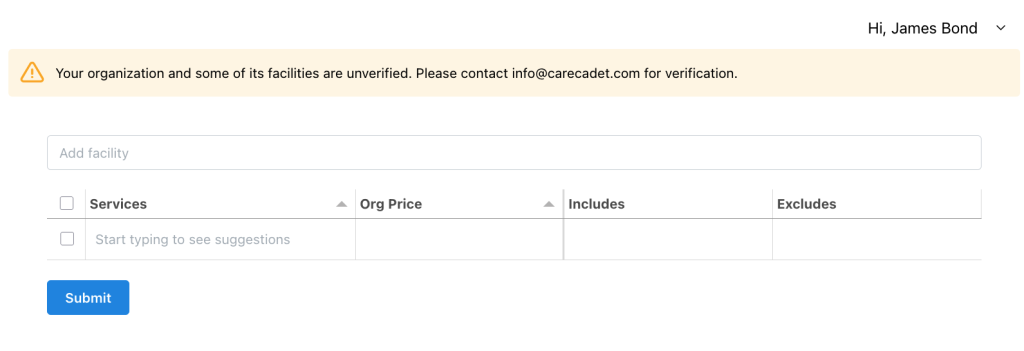
You may notice a warning icon next to a newly added facility. This indicates that verification is needed. To ensure accuracy and integrity, we require the super admin to provide supporting evidence confirming that each facility is officially part of the organization.
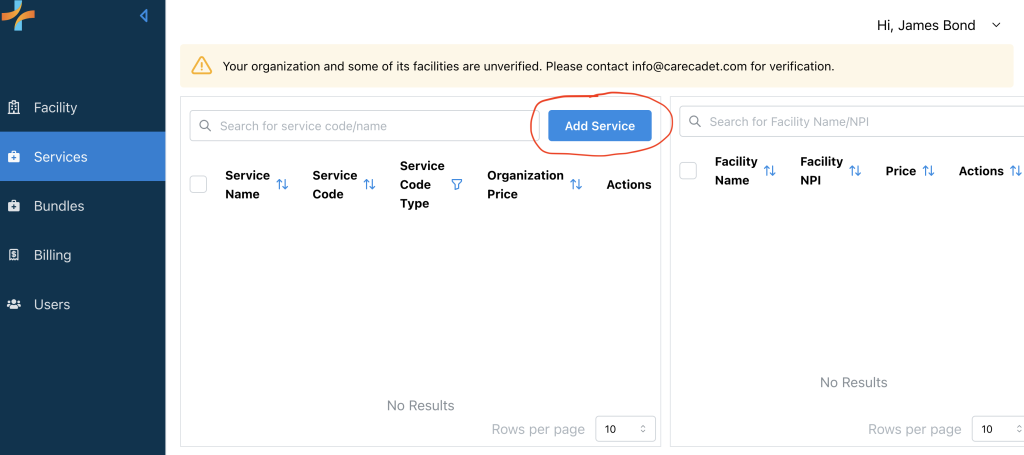
Adding Services
Once you’ve added facilities, the next step is to add the services offered and their corresponding prices for each location. For example, in our case Transparent Imaging Center offers two services: X-ray of chest, 2 views and MRI scan of blood vessels of neck with contrast.
To add services and their prices, navigate to the Service tab and then click on “Add Service.”
There are three scenarios for entering service prices for an organization:
- All Facilities Share the Same Prices: If your organization uses a standard price list for all locations, simply add services by searching for the service name in the Services column and entering the service cost in the Org Price column. You can also specify what is included and excluded in this service. This pricing will apply uniformly across all facilities
- Each Facility Has Its Own Unique Pricing: On the top, you can search for and select an individual facility to add it as a new column. Enter the facility-specific pricing directly, without needing to input an organization-wide price.
- Most Facilities Follow Standard Pricing, With a Few Exceptions: Similar to Scenario 2, add the facilities with exceptions. Input the organization-wide price and the prices for the exceptional facilities. The organization-wide price will automatically apply to all facilities except those specified as exceptions.